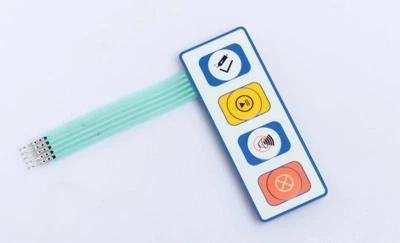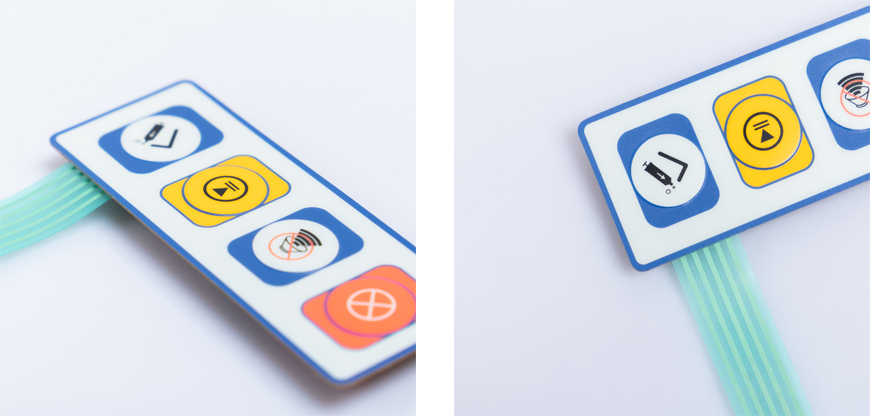
In the realm of electronic devices and control systems, membrane switch panels have become an indispensable component. These panels are not only functional but also highly customizable, making them an ideal choice for various applications. In this comprehensive guide, we will delve into the world of DIY membrane switch panels, exploring what they are, how they work, and how you can create your very own custom control solution.

1. Introduction to Membrane Switch Panels
· Understanding the Basics
· Applications and Benefits
2. Components of a Membrane Switch Panel
· Overlay
· Adhesive Layer
· Graphic Layer
· Circuit Layer
· Backer Layer
3. How Do Membrane Switch Panels Work?
· The Principle of Operation
· Tactile Feedback
4. Advantages of DIY Membrane Switch Panels
· Cost-Effective Customization
· Durability and Longevity
· Aesthetics and Branding
5. Materials and Tools You'll Need
· Membrane Sheet
· Conductive Ink
· Cutting Tools
· Adhesive
· Graphic Overlay
6. Step-by-Step Guide to Creating Your DIY Membrane Switch Panel
· Design and Layout
· Printing the Graphic Overlay
· Circuit Design and Printing
· Assembling the Layers
· Testing and Troubleshooting
7. Tips for Successful DIY Membrane Switch Panel Creation
· Precision is Key
· Avoiding Common Mistakes
· Maintenance and Care
8. Applications and Industries
· Electronics and Appliances
· Medical Devices
· Industrial Control Panels
9. Future Trends in Membrane Switch Panel Technology
· Touchscreen Integration
· Enhanced Durability
· Sustainability
10. Conclusion
· Unlocking Creativity and Control
Understanding the Basics
Membrane switch panels are thin, flexible, and easy-to-customize interfaces used to operate various electronic devices. They consist of multiple layers, including a graphic overlay, adhesive, circuit, and backer layers. These panels provide tactile feedback when pressed, making them suitable for a wide range of applications.
Applications and Benefits
The versatility of membrane switch panels is evident in their applications. From consumer electronics to medical devices and industrial control panels, these panels find their place in diverse industries. Their benefits include resistance to moisture, dust, and chemicals, making them durable and reliable.
To comprehend the DIY creation process better, let's break down the key components of a membrane switch panel.
Overlay
The topmost layer of a membrane switch panel is the overlay. This layer often features printed graphics and labels, allowing users to identify the functions of each switch.
Adhesive Layer
Beneath the overlay lies the adhesive layer, which attaches the panel securely to the device or control surface.
Graphic Layer
The graphic layer is responsible for displaying the icons or labels associated with each switch on the overlay.
Circuit Layer
Underneath the graphic layer is the circuit layer, composed of conductive traces that facilitate the electrical connections when a switch is pressed.
Backer Layer
The backer layer provides structural support to the entire panel, ensuring it remains intact and functional.
The Principle of Operation
When a user presses a button on a membrane switch panel, the top layer flexes, causing a conductive pad on the graphic layer to make contact with the circuit layer. This connection completes the circuit, registering the user's input.
Tactile Feedback
Membrane switch panels are designed to offer tactile feedback, giving users a satisfying click or tactile sensation when they press a button. This feedback enhances the user experience and reduces the chances of accidental button presses.
Cost-Effective Customization
One of the most significant advantages of DIY membrane switch panels is the cost-effective customization they offer. You can design and create panels tailored to your specific requirements without breaking the bank.
Durability and Longevity
Despite their thin and flexible nature, membrane switch panels are highly durable. They are resistant to wear and tear, ensuring a long lifespan for your control solution.
Aesthetics and Branding
Custom graphic overlays allow you to incorporate branding elements, logos, and unique designs into your control panels, enhancing the visual appeal of your devices or equipment.
Before embarking on your DIY membrane switch panel project, gather the following materials and tools:
Membrane Sheet
Start with a quality membrane sheet as the base material for your panel.
Conductive Ink
Conductive ink is used to create the circuit traces on the graphic layer.
Cutting Tools
Precision cutting tools are essential for accurately shaping the panel components.
Adhesive
Select a suitable adhesive to bond the layers securely.
Graphic Overlay
Design and print a graphic overlay that suits your preferences and requirements.
Design and Layout
Begin by creating a detailed design and layout for your switch panel. Consider the placement of buttons, labels, and any specific functions you want to incorporate.
Printing the Graphic Overlay
Design and print the graphic overlay that will be placed on top of the panel. Ensure it aligns perfectly with your layout.
Circuit Design and Printing
Using conductive ink, design and print the circuit traces on the graphic layer. This step is crucial for the electrical functionality of your panel.
Assembling the Layers
Carefully layer the membrane sheet, adhesive, graphic overlay, circuit layer, and backer layer. Ensure proper alignment and bonding.
Testing and Troubleshooting
Before finalizing your DIY membrane switch panel, thoroughly test each button and circuit to ensure proper functionality. Troubleshoot any issues that may arise.
Precision is Key
Pay attention to detail and maintain precision throughout the creation process to ensure your panel functions flawlessly.
Avoiding Common Mistakes
Learn from common mistakes made by beginners to save time and resources.
Maintenance and Care
Once your membrane switch panel is in use, practice regular maintenance to prolong its lifespan.
Membrane switch panels have found their way into various applications and industries, including:
Electronics and Appliances
From microwave ovens to remote controls, membrane switch panels are present in many household devices.
Medical Devices
Medical equipment often incorporates membrane switch panels due to their hygiene, ease of use, and customizability.
Industrial Control Panels
In industrial settings, these panels are used for controlling machinery and processes, thanks to their durability and functionality.
As technology continues to evolve, so do membrane switch panels. Some future trends to watch out for include:
Touchscreen Integration
The integration of touchscreen technology into membrane switch panels will provide even more intuitive control options.
Enhanced Durability
Advancements in materials will make membrane switch panels even more durable, suitable for extreme environments.
Sustainability
The industry is moving towards eco-friendly materials and production methods to reduce its environmental footprint.
DIY membrane switch panels empower you to create custom control solutions tailored to your specific needs. Whether you're enhancing the functionality of an existing device or developing a new product, these panels offer versatility, durability, and aesthetic appeal. Dive into the world of membrane switch panel creation and unlock your creativity.
1. Are DIY membrane switch panels difficult to create?
Creating DIY membrane switch panels can be a bit challenging for beginners, but with patience and attention to detail, it's certainly achievable.
2. What are the primary applications of membrane switch panels?
Membrane switch panels are used in a wide range of applications, including electronics, medical devices, and industrial control systems.
3. Can I customize the appearance of my DIY membrane switch panel?
Yes, you can customize the graphic overlay to incorporate logos, branding, and unique designs.
4. Are membrane switch panels durable in harsh environments?
Yes, membrane switch panels are known for their durability and can withstand harsh conditions.
5. Where can I find the materials and tools needed for DIY membrane switch panel creation?
You can source the necessary materials and tools from electronics supply stores or online suppliers.