In today's tech-savvy world, touch-sensitive devices are ubiquitous. From smartphones to microwave ovens, we interact with them daily. But have you ever thought about creating your own touch-sensitive interface? Well, you're in luck! In this article, we will guide you through the fascinating world of DIY membrane switch touch pads. Whether you're a tech enthusiast, a hobbyist, or someone looking for a unique input solution, this guide has got you covered.

Before we dive into creating our own DIY membrane switch touch pad, let's understand what membrane switches are.
What Are Membrane Switches?
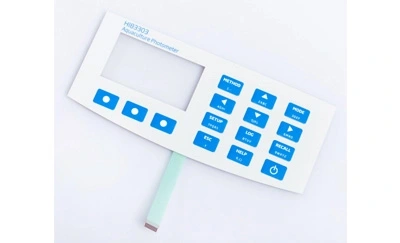
Membrane switches are flexible, low-profile, and pressure-sensitive devices used to control various electronic devices. They consist of multiple layers, including a flexible membrane layer with printed conductive traces and a top layer with custom graphics or labels.
How Do Membrane Switches Work?
When you apply pressure to a specific area on the top layer, it presses down on the corresponding conductive trace, creating an electrical connection. This interaction is what triggers the desired function, making membrane switches an essential component in many electronic devices.
Now, let's explore how you can create your own DIY membrane switch touch pad.
Before you start your project, gather the following materials:
· Flexible plastic membrane
· Conductive ink or copper tape
· An adhesive layer
· A protective overlay
· A microcontroller (e.g., Arduino)
· Soldering iron and solder
· Cutting tools
· Multimeter
1. Design Your Membrane Layout
Begin by designing your desired touch pad layout. You can use graphic design software to create the layout and labels for your touch pad.
2. Assemble the Layers
Carefully assemble the layers of your membrane switch, starting with the flexible plastic membrane, followed by the conductive traces and adhesive layers. Ensure everything aligns correctly.
3. Connect to a Microcontroller
Use a microcontroller like Arduino to connect the conductive traces to the appropriate pins. This step is crucial for translating touch inputs into actionable commands.
4. Solder the Connections
Using a soldering iron, solder the connections securely to ensure a stable electrical connection.
5. Test Your DIY Touch Pad
After assembling and soldering, it's time to test your DIY membrane switch touch pad. Ensure that each area responds as expected when touched.
Now that you've created your custom touch pad, let's explore the advantages of using DIY membrane switches.
Customization
One of the significant benefits is the ability to customize the layout and design to suit your specific needs or preferences.
Cost-Efficiency
DIY membrane switches can be more cost-effective than purchasing pre-made touch pads, especially for unique or specialized projects.
Learning Experience
Embarking on a DIY project like this is an excellent opportunity to learn about electronics, microcontrollers, and the inner workings of touch-sensitive devices.
In conclusion, DIY membrane switch touch pads offer a fun and engaging way to create custom input solutions for your electronic projects. With a bit of creativity and some basic materials, you can design and build your very own touch-sensitive interface. So, what are you waiting for? Get started on your DIY journey today!
1. Is prior electronics experience necessary to create a DIY membrane switch touch pad?
No, while some electronics knowledge is helpful, this project can be a great learning experience for beginners as well.
2. Can I use a different microcontroller other than Arduino?
Yes, you can use other microcontrollers based on your preferences and project requirements.
3. Are DIY membrane switch touch pads durable?
The durability depends on the materials used and the quality of the assembly. With proper care, they can last a long time.
4. What are some creative applications for DIY membrane switch touch pads?
DIY touch pads can be used in a variety of applications, such as custom keyboards, game controllers, and interactive art installations.
5. Where can I find the materials for this project?
You can find the materials needed for this project at electronics stores or online retailers that specialize in DIY electronics components.